Safety & Information

Responsibility Starts With Knowledge.

Access essential safety information, product documentation, and resources designed to support responsible ownership.
SAFETY RULES

  • Safety should be the first concern of every firearm owner in every situation.
  • Always treat your firearm as loaded as such that it will fire if the trigger is pulled; so, handle it with care.
  • Do not put your finger inside the trigger guard unless you intend to fire.
  • Do not fire randomly in public places and into the sky because the bullet can travel in unpredictable directions with considerable velocity and can glance off from any surfaces like rocks or surface water causing unwanted injuries and damages to anyone or any property.
  • Never lock a loaded firearm and never load a locked firearm.
  • Before handling any firearm familiarize yourself with its working and never depend on its mechanical features alone.
  • Do not consume intoxicants before or while shooting; make sure not to use the firearm in unstable mental or physical conditions.
  • Always wear eye and ear protectors that are specified for firearm use.
  • Know all the legal consequences of using the firearm.
  • Before using your firearm ensure that there are no obstructions in the barrel like mud, water, snow or any other object causing dangerous increase in pressure 3 resulting in damage of your firearm and causing unwanted injuries to yourself and others.
  • Always use the specified ammunition for your firearm.
  • Do not disassemble, manipulate, adjust or change any of the internal components of your firearm resulting in improper functioning thus affecting the safety and reliability of your firearm.

STORAGE

  • One of the most important rules of firearm safety is its safe and secure storage.
  • Keep your firearm locked, unloaded and secure when not in use.
  • Keep ammunition and the firearm in separate location.
  • Always prevent your firearm from being stolen or being used by untrained or unqualified individuals.
  • Do not assume a hiding place is a safe storage location and make sure to change the storage place of your firearm from time to time in order to maintain its inaccessibility from unauthorized persons.
  • Always keep your firearm away from children.

TRANSPORTATION

  • Safe and secure transportation of your firearm is solely your responsibility.
  • Make sure your firearm is always unloaded and locked during transportation.
  • Obey all the laws relating to the storage and transportation of firearms. Your local police department can furnish you with available information on storing and transporting a firearm thus preventing unauthorized access of your firearm by others.

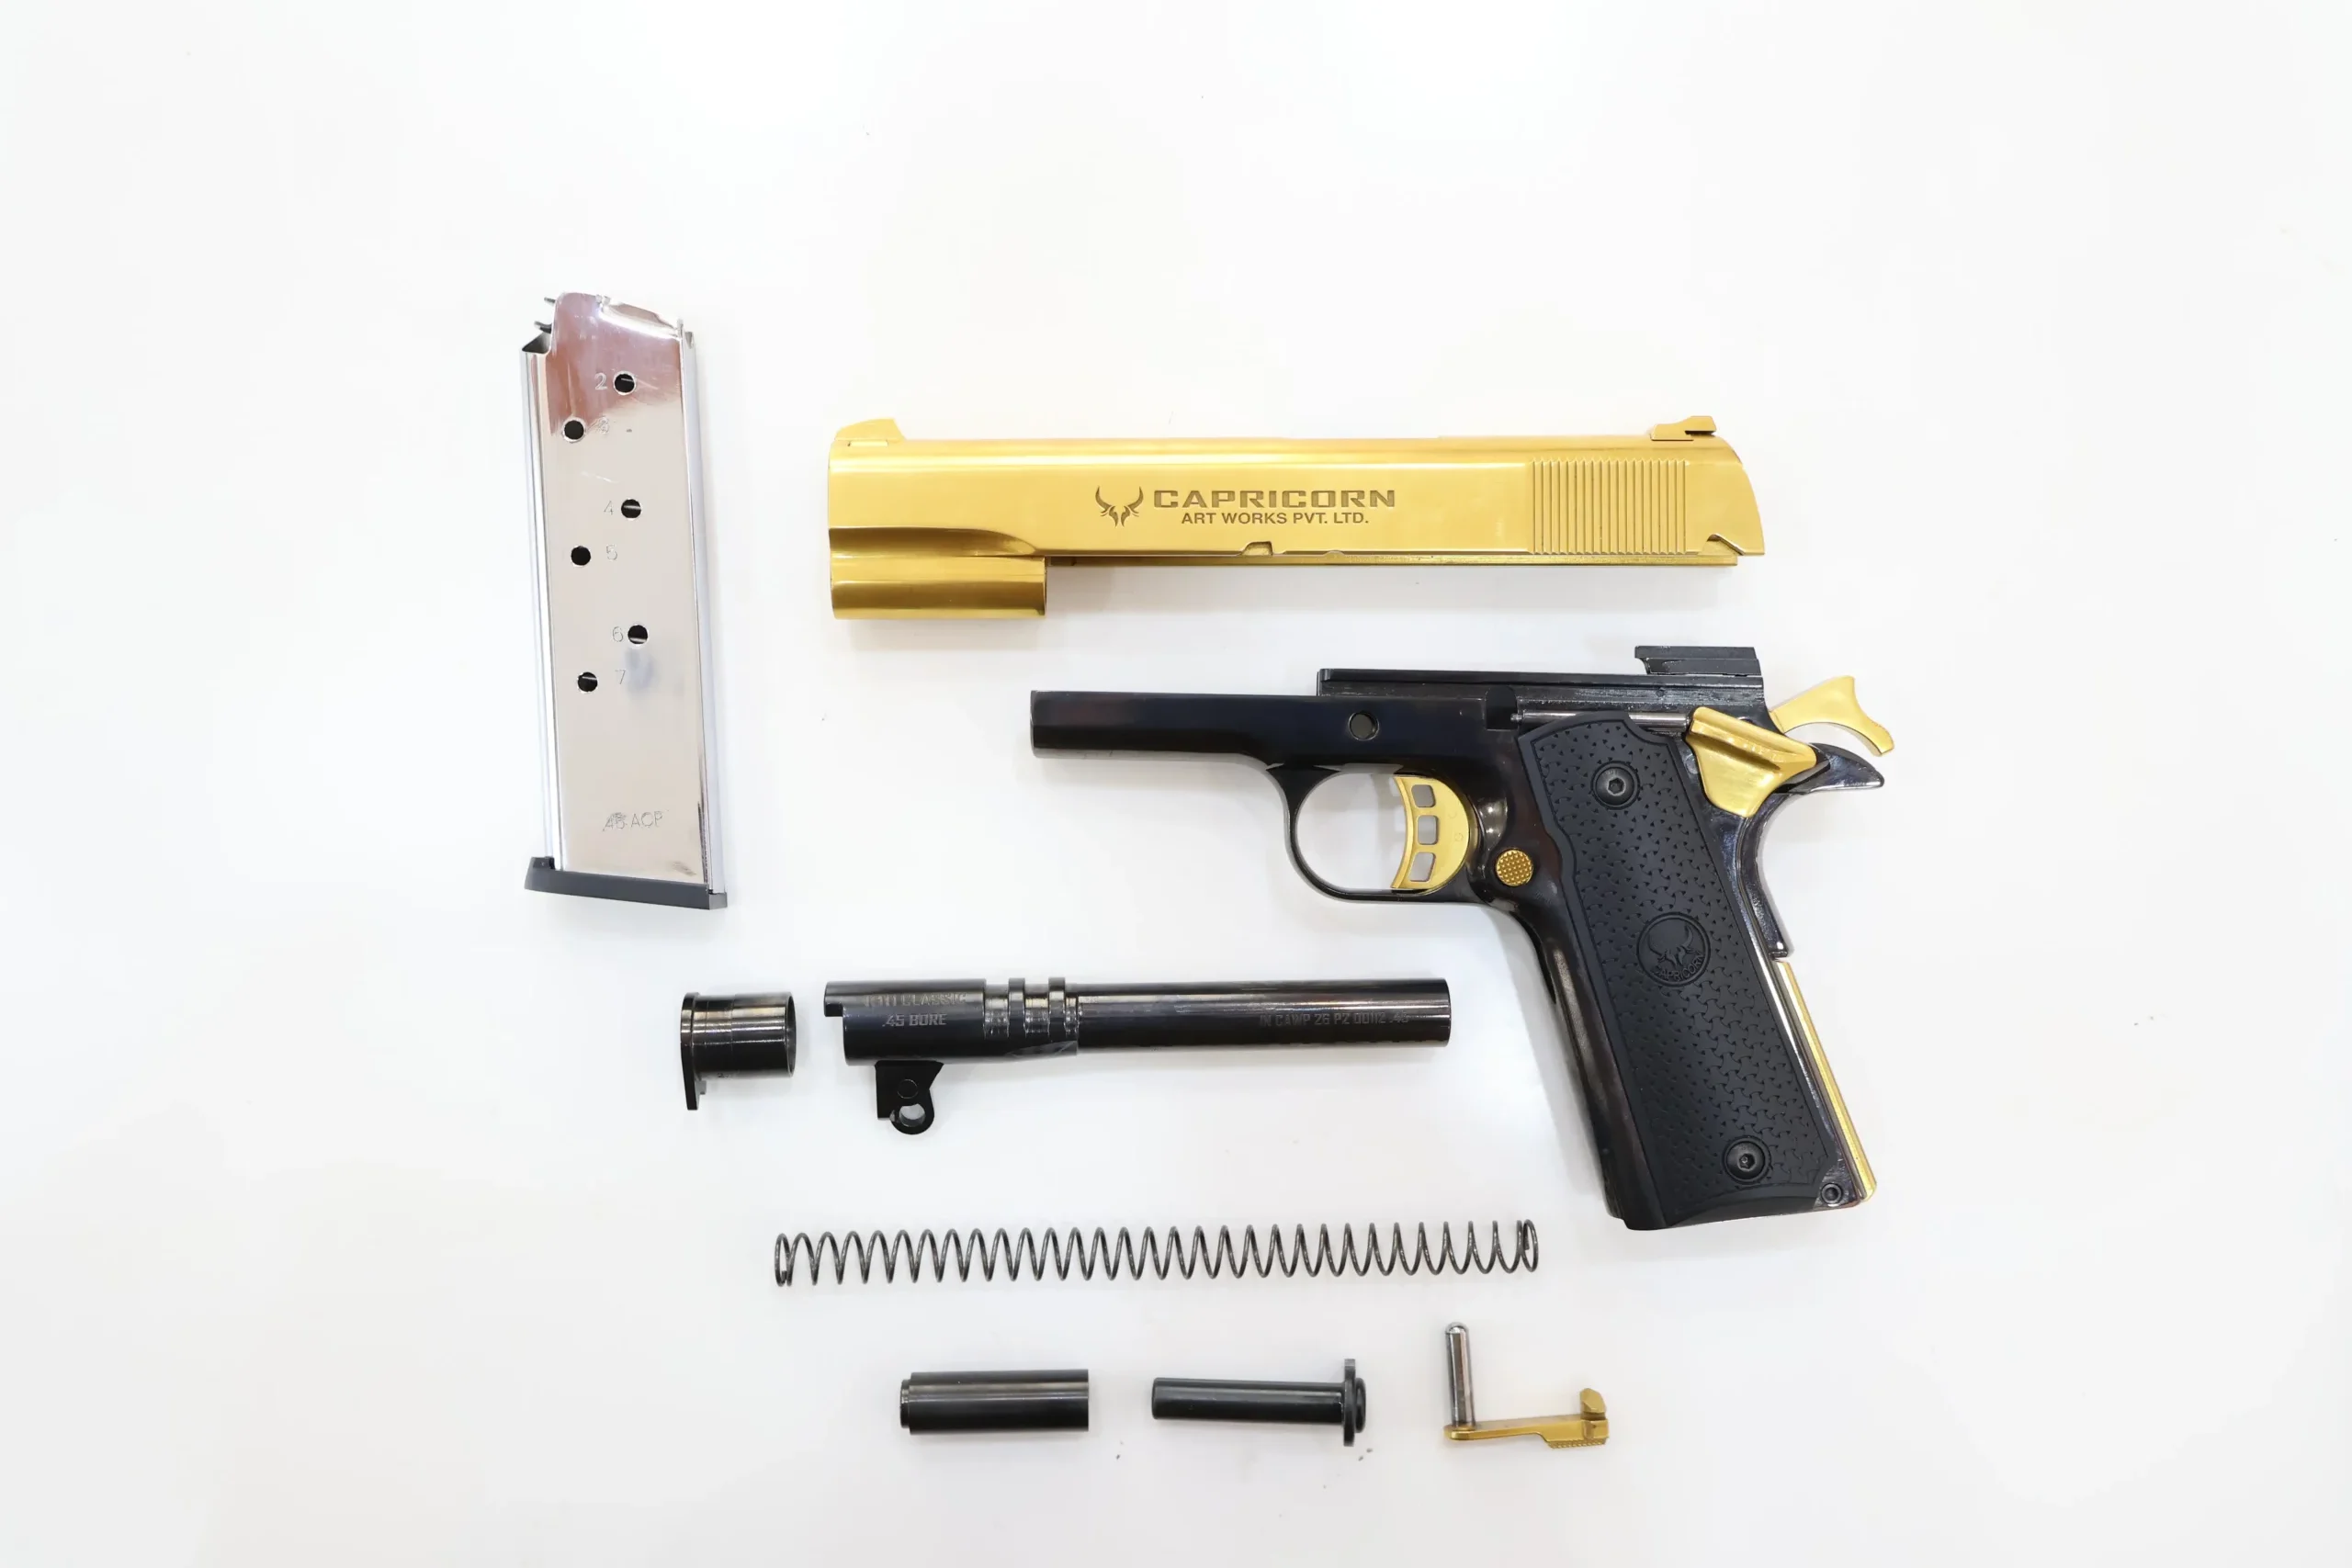
MAIN COMPONENTS

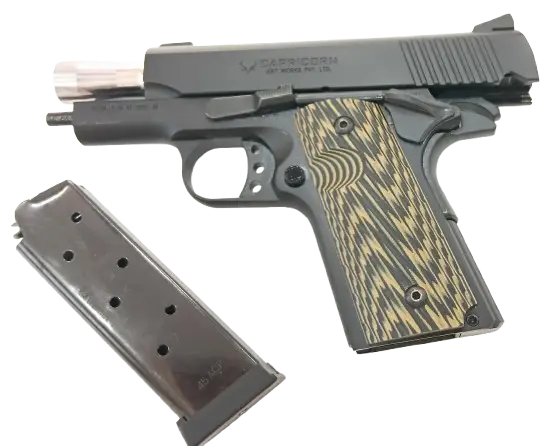
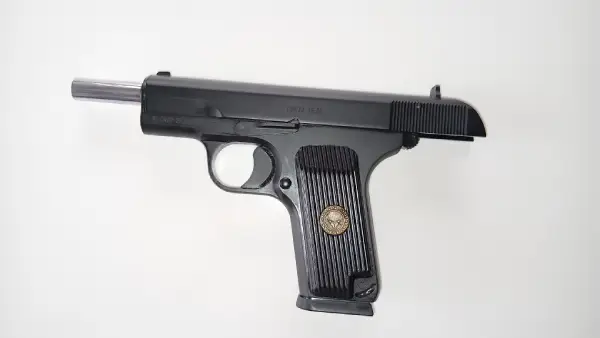
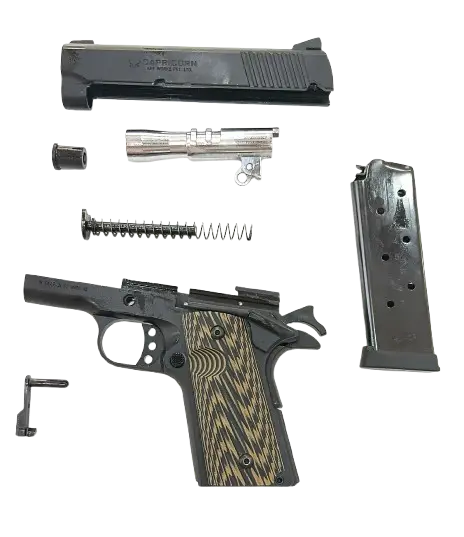
dissambled first pic
1. SLIDE (Including Front and Rear Sight) 2. FRAME (Including Grips and Trigger System)
3. BARREL BUSHING 4. BARREL WITH LINK
5. RECOIL SPRING 6. RECOIL SPRING PLUG
7. RECOIL SPRING GUIDE 8. SLIDE STOPPER

FUNCTIONAL PRINCIPLES

  • After firing the pressure developed by the combustion gas in the chamber recoils the slide and barrel assembly together. After a run of slide barrel assembly, the block falls and releases the slide letting it recoil while the barrel stops against the frame. Period of its rear-ward movement, the slide extract and ejects the fired cartridge case, cocks the hammer and compress the recoil spring, with the force of recoil spring tense, the slide then moves forward feeding the next cartridge from the magazine into the chamber and causing barrel- slide locking. The slide stays open after the last cartridge in the magazine has been fired and eject.
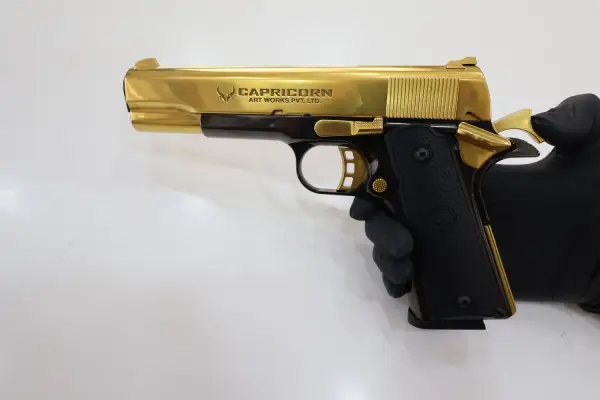
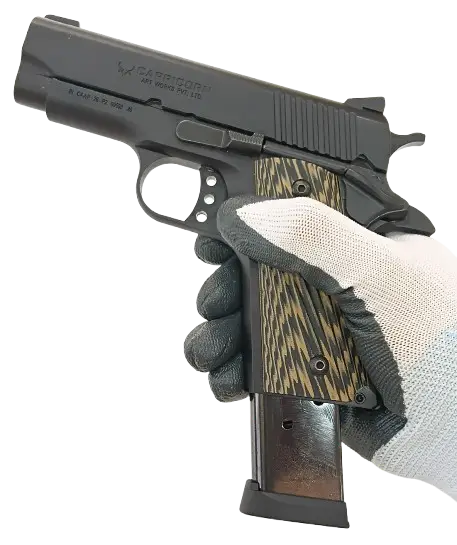
  • CAPRICORN 1911 Pistol models have Grip Safety System. Shooting can be made if the user holds the grip and feels the grip safety by his or her hand.
  • CONTROL BEFORE USAGE
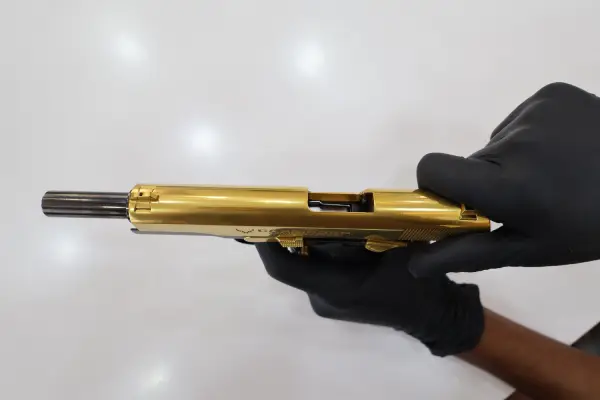
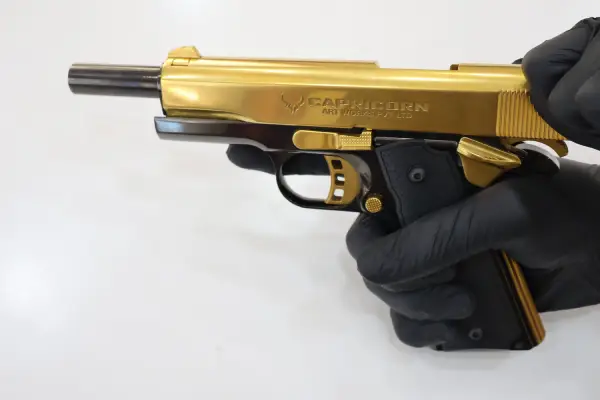
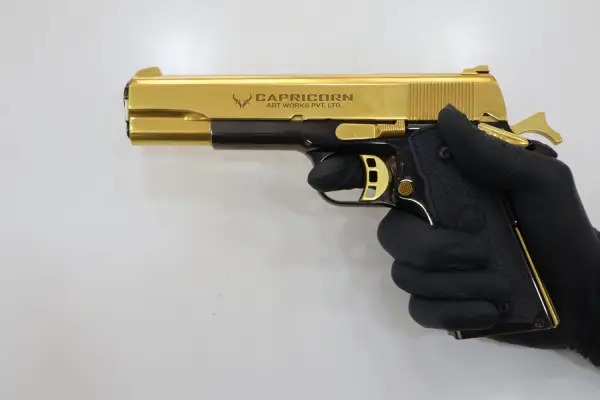
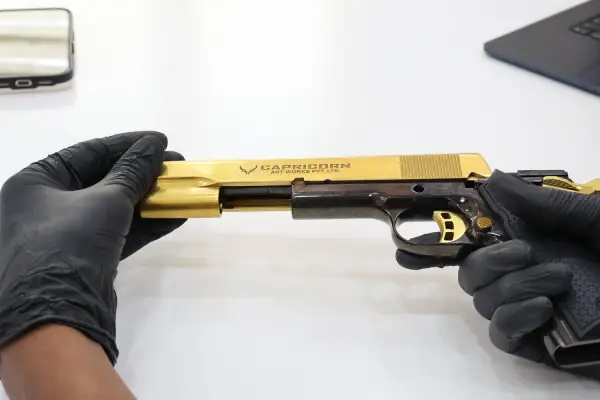
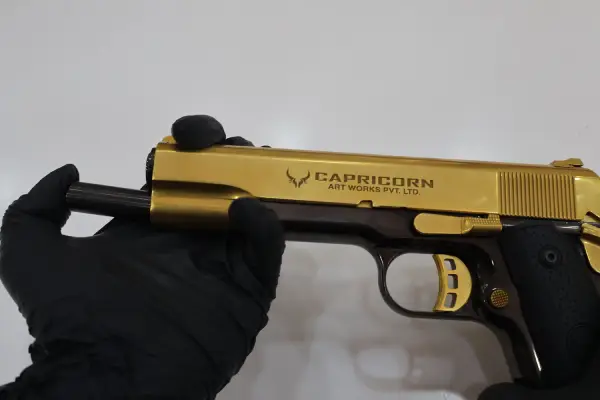
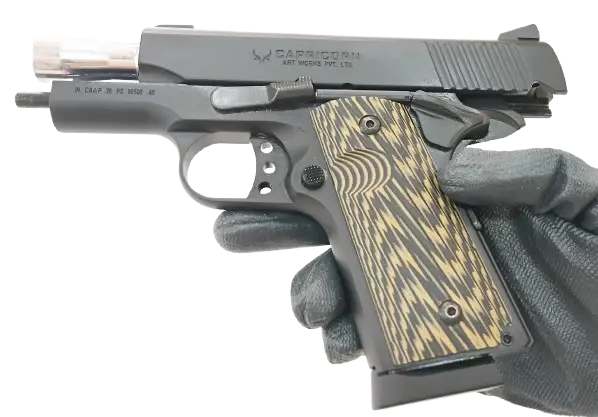
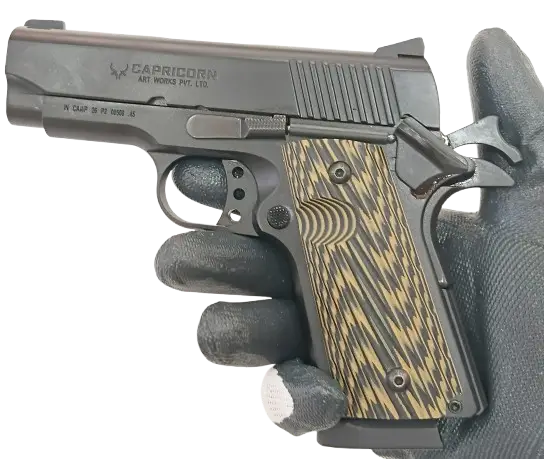
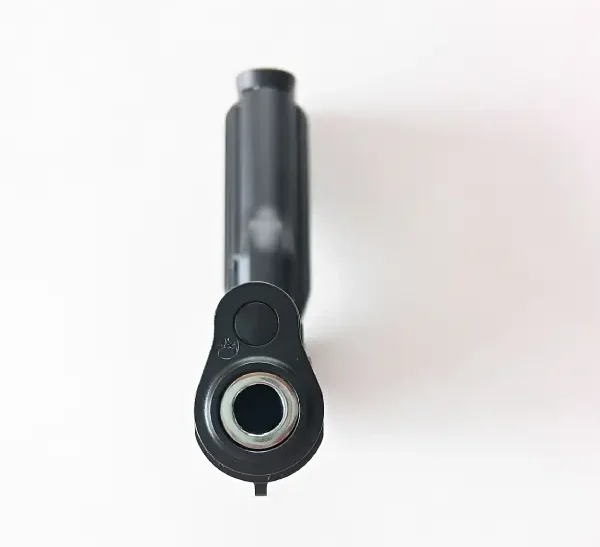
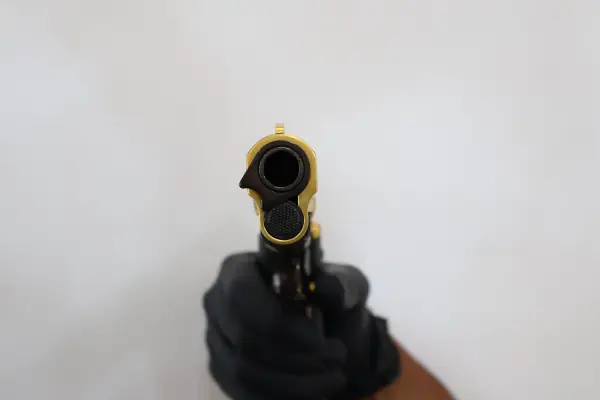
    Be sure that the chamber is empty and the barrel is free from dirt and obstructions (Picture1). If you do not intend to fire, keep your fingers off the trigger. This pistol has grip safety system that’s why shooting cannot be made if the grip safety is not deactivated by holding the grip by the user, this system provides an extra safety to the pistol (Picture2).

PICTURE 1

PICTURE 2

  • CONTROL AFTER USAGE
    Make sure that the pistol is unloaded and the barrel is free of dirt.
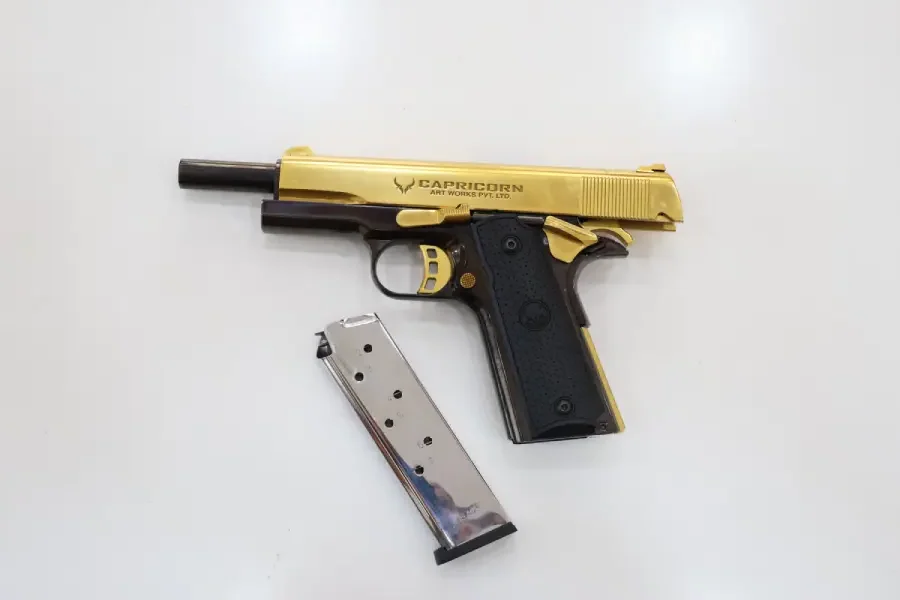
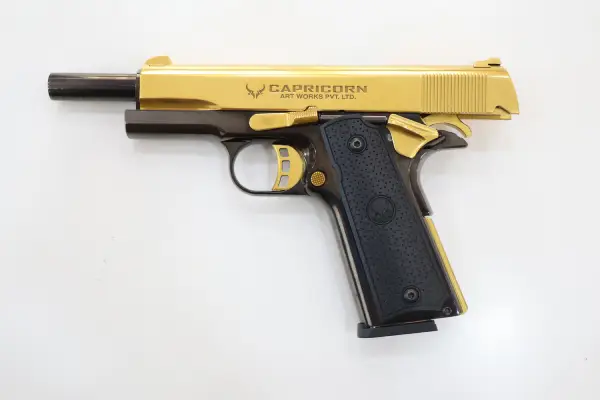
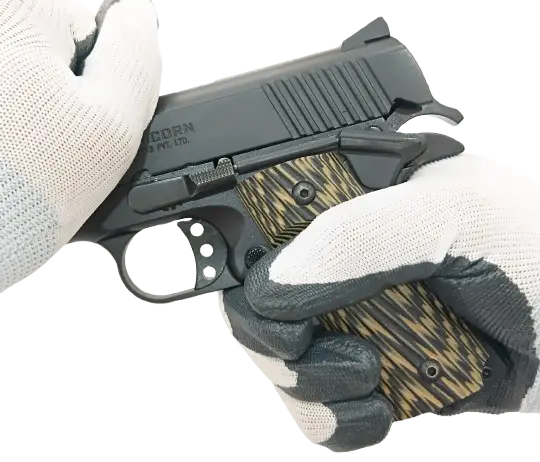
    Also make sure that the magazine is empty (Picture 1, 3).

PICTURE 3

PICTURE 4

  • SLIDE AND FRAME CONTROL
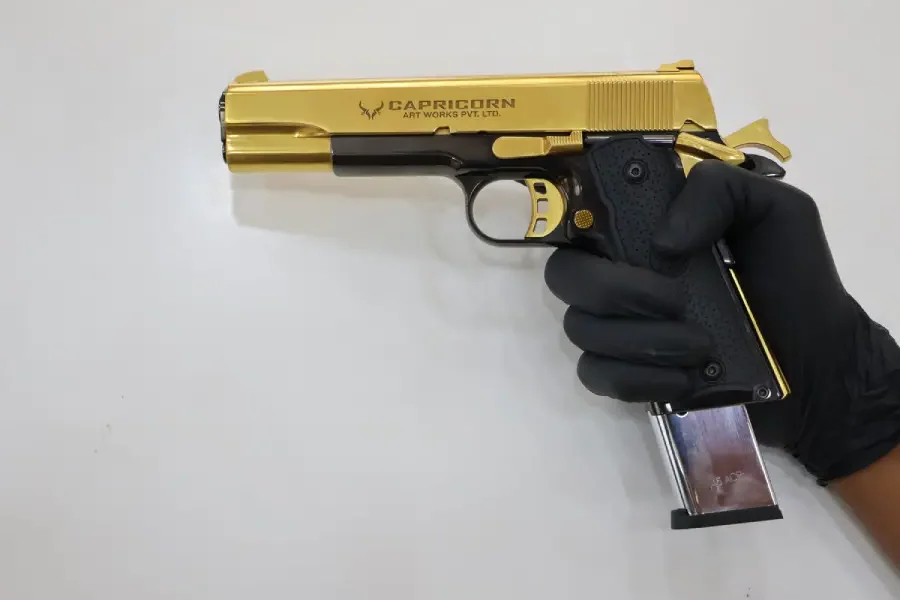
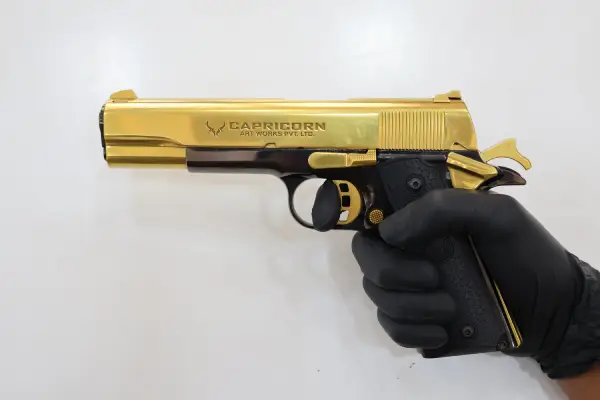
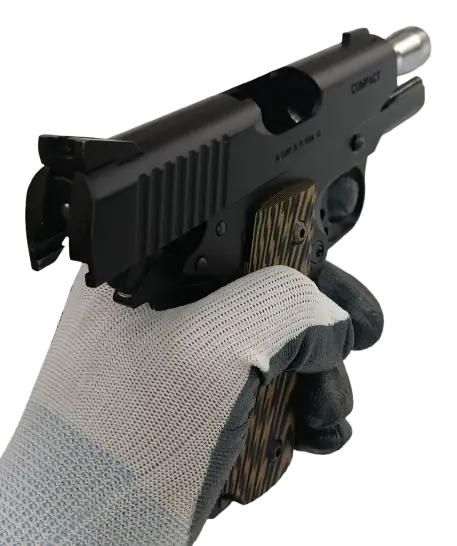
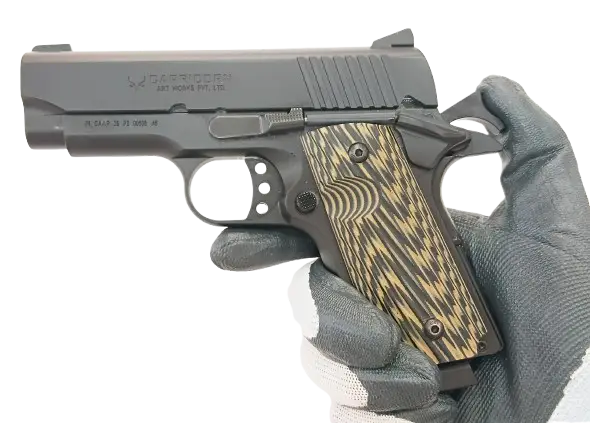
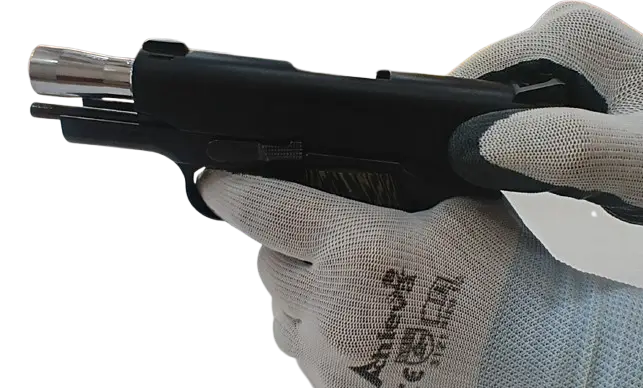
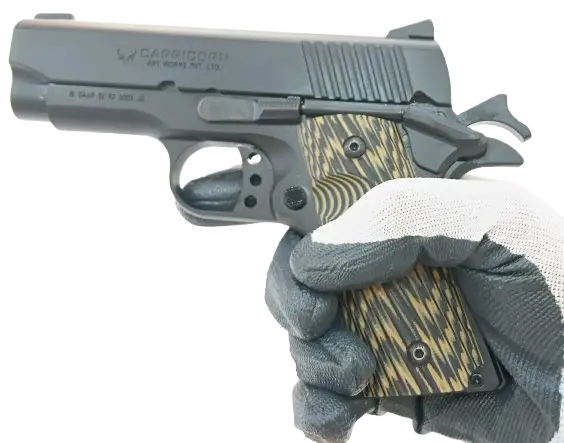
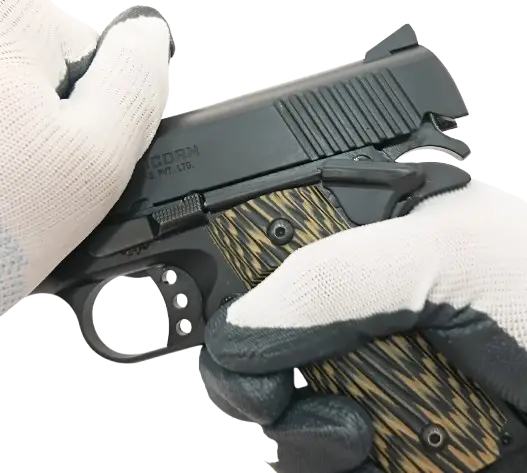
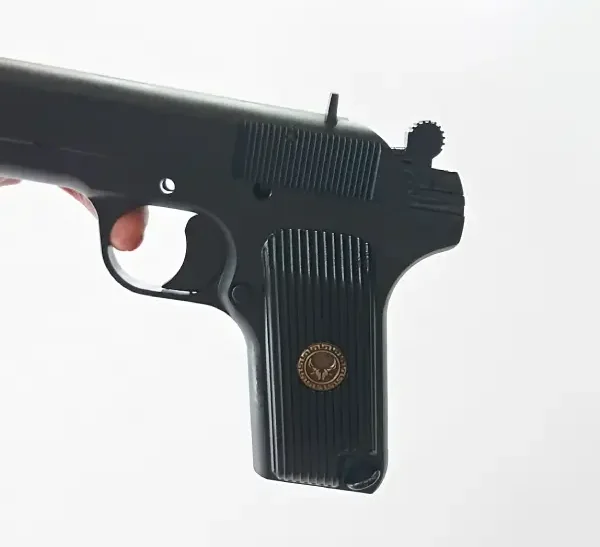
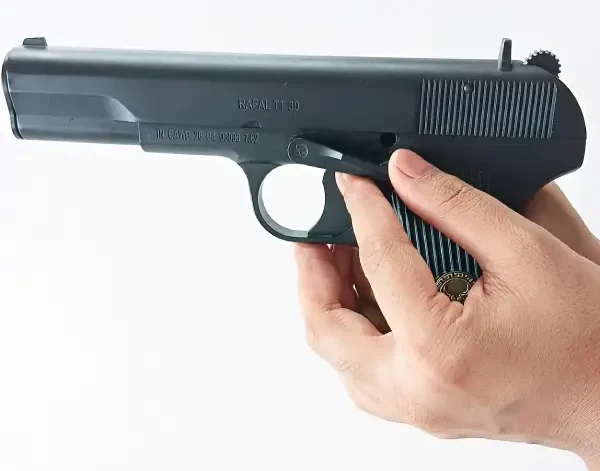
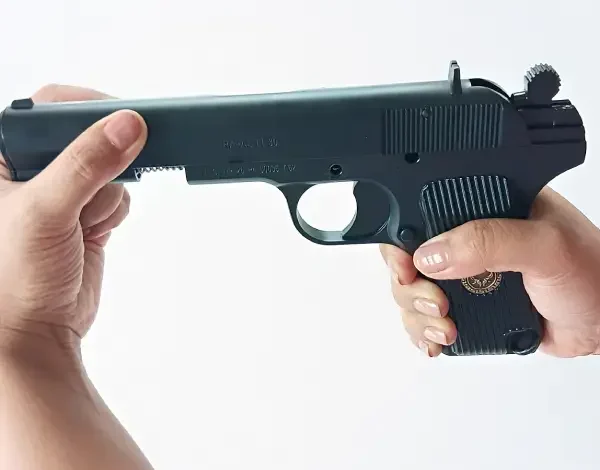
    Release the magazine (Picture 4). Pull the slide all the way back (Picture 3). While drawing the slide back, check whether the slide moves easily on the body frame and cocks the hammer or not (Picture 5). Also check the grip safety is working or not when the hammer is cocked. If the hammer is cocked when you retract the slide, pull the trigger and check if the hammer de-cocks easily or not (Picture 6). Inserting an empty magazine and repeat the same action. The slide must stay locked and open position in rear (Picture 7).

PICTURE 5

PICTURE 6

PICTURE 7

PICTURE 8

  • TRIGGER AND SAFETY LOCK CONTROL After cocking the hammer, pull the trigger and check if the hammer strikes the firing pin appropriately or not. Make sure that the trigger does not operates when the pistol is at safety position (safety liver is up) (Picture 8). Also make sure that the grip safety is operating perfectly when the safety lock is down.

NOTE: THE SAFETY LOCK CAN BE AT SAFETY POSITION ONLY WHEN THE HAMMER IS COCKED THAT’S WHY THE SAFETY LOCK CANNOT BE USED IF THE HAMMER IS NOT COCKED.

Warning: Never assume that the firearm is unloaded and tamper with it. Never let the muzzle of a firearm point at any part of your body or at another person. This is specifically important when loading or unloading the firearm. Do not apply force to the pistol with any object while handling, cocking, disassembling or cleaning the pistol. The pistol must be controlled by an authorized gun expert in case of an extraordinary condition such as defect, breakdown or heavy drops.

  • PREPARING TO FIRE
    Make sure that the pistol is on a safety mode (Picture 9). Remove oil from the barrel by using cleaning rod and soft cloth. Check the pistol if it is operating excellent. Be sure that the magazine is housed correctly.
  • LOADING THE PISTOL
    Insert the loaded magazine to the pistol until the magazine release button is locked. Pull the slide fully back and release it carefully. Now, the pistol is loaded and cocked.
  • FIRING
    Make sure that the pistol is set at a safety position (Picture 9). This model pistols have single action shooting mechanism. Aim the pistol to the target, rotate the safety lock down (Picture10). When you are ready to fire while holding the grip for blocking the grip safety, pull the trigger and fire.

WARNING

The pistol is still loaded, the hammer cocked and ready to be fired again, if you do not intend to fire, keep your fingers off the trigger.
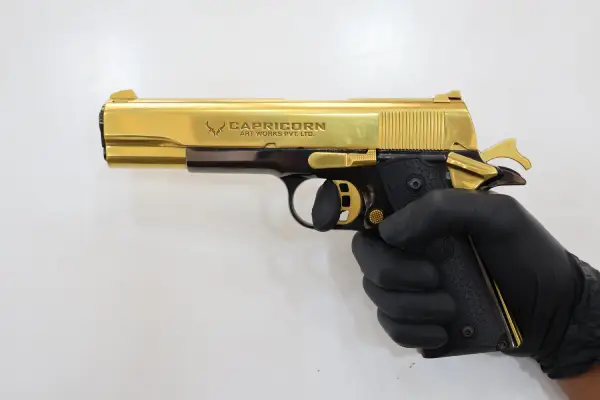
PICTURE 10

  • After last shooting, the slide will stop at the rear side of the pistol. It means that the magazine is empty. For shooting again remove the empty magazine and insert the fully loaded magazine. Push the slide stop latch to reload the pistol.
  • UNLOADING THE PISTOL Press the magazine release button to remove the magazine from the pistol (Picture 4). Pull the slide fully back to extract the cartridge from the chamber (Picture1). When you are sure that the chamber is completely empty & the last cartridge is extracted, release the slide to move forward carefully.

DISASSEMBLY

1. Remove the magazine by pressing the magazine release button (Picture 4).
PICTURE 11b
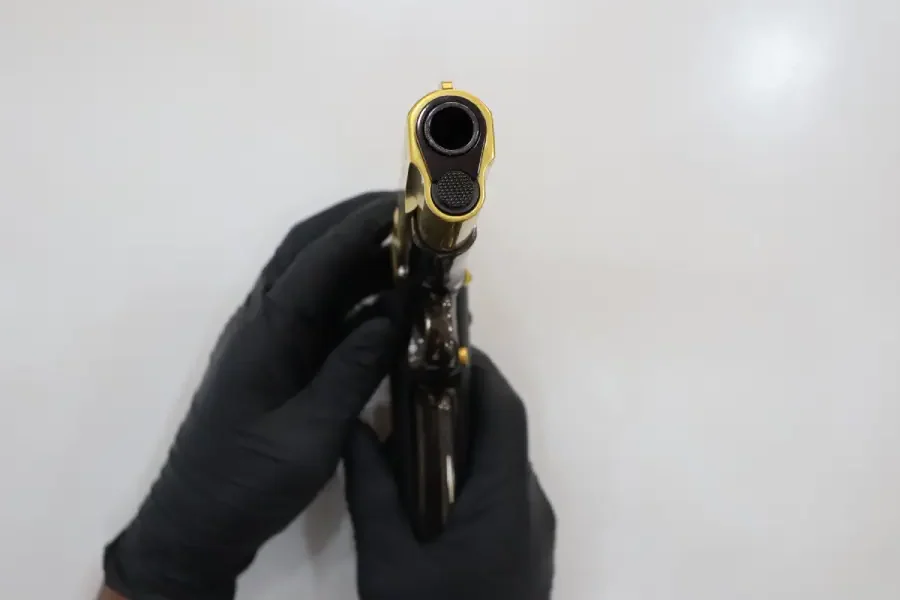
PICTURE 11a

2. Place the pistol on a flat surface from the hammer side (Picture 11) and push the recoil spring plug below the barrel bushing from the right-hand thumb and rotate barrel bushing in the clockwise direction.

3. Now remove the recoil spring plug, recoil spring, from the slide (Picture 12).
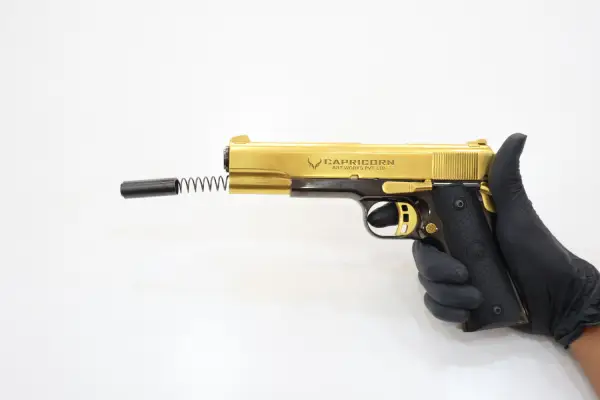
PICTURE 12

4. Hold the pistol with the right hand.

5. Pull the slide back until the small notch (second notch from the top of the slide) is at the same level where the Slide stops & hold the pistol at this position (Picture 13).
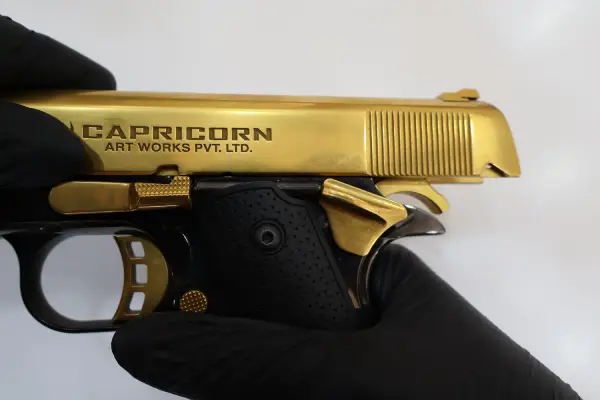
PICTURE 13
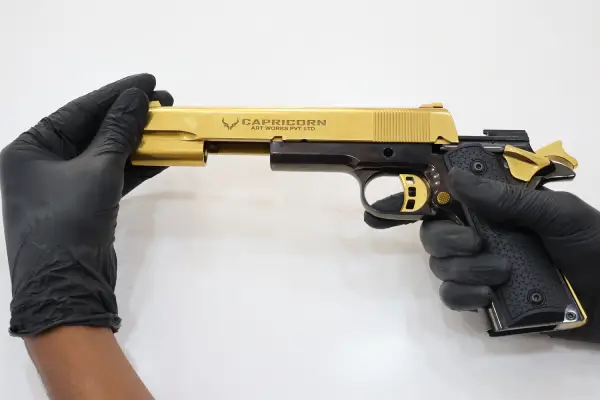
PICTURE 14

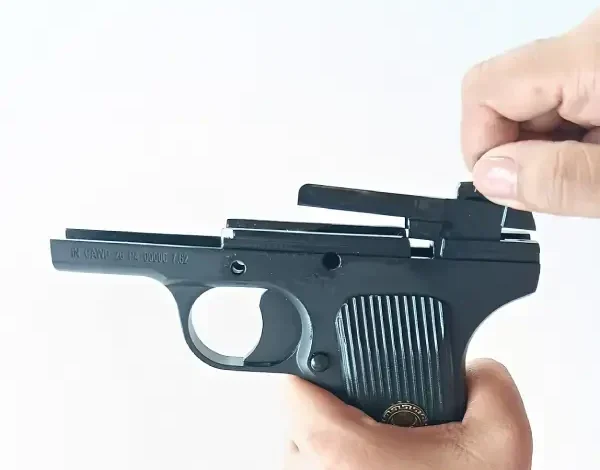
6. Remove the Slide Stop by pressing the top of the Side Stop with index finger. Separate the Slide stop from the pistol (Picture 13).

7. Hold the slide with the left hand & separate the slide from the frame (Picture 14).

8. Remove the recoil spring guide which is located on the Barrel (Picture 14).

9. Remove the barrel bushing from the slide by rotating it in anticlockwise direction and then remove the barrel from the slide by pushing it in the forward direction.
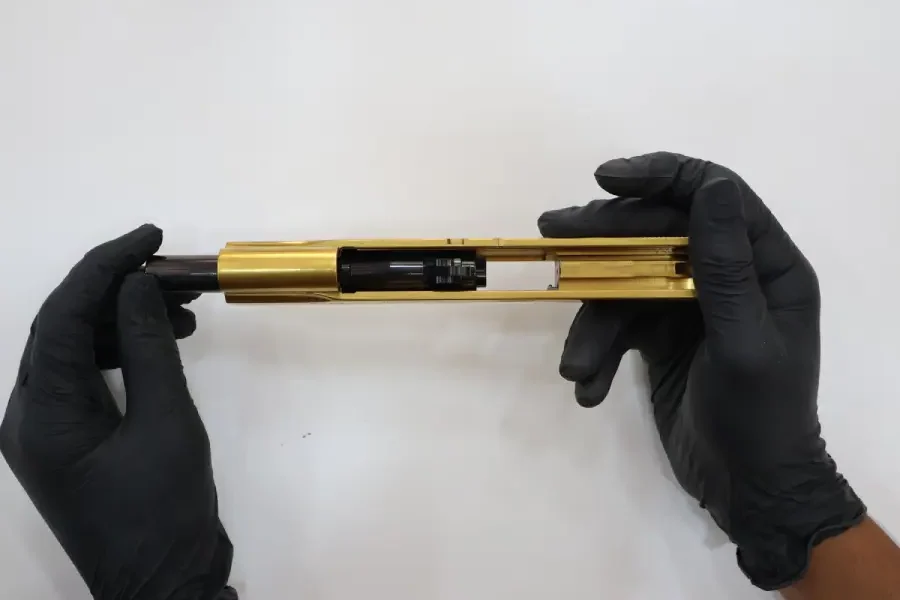
After these serial operations the main components of the pistol are disassembled & disassembly process is completed.

CLEANING AND LUBRICATION

  • Before cleaning check that the pistol is unloaded (magazine removed from pistol and chamber clear). Also ensure that the magazine is unloaded.
  • Your firearm is a precision instrument. After each use of the pistol or after being subjected to extreme weather conditions, the pistol should be cleaned and lubricated.
  • Also, before using the pistol for the first time, it should be examined and cleaned.
  • Starting with the barrel and from chamber end, insert a brass brush/cloth through the bore of the barrel until the bristles completely exit at muzzle end.
  • Pull the brush back until the bristles completely exit at chamber end.
  • Remove any residue on the frame with light brushing.
  • After cleaning, lightly coat the metal parts, internal and external with high-quality firearm oil.

ASSEMBLY

1. Hold the slide from the left hand and place the barrel with barrel bushing in a slide (Picture 15).

PICTURE 15

PICTURE 16

2. Now rotate the barrel bushing in anti-clockwise direction.
3. Now keep the recoil spring guide on the barrel hold the pistol from the other hand and put the slide to the frame (Picture16).
4. And fix the slide stop. (Picture 17).

PICTURE 17

PICTURE 18

PICTURE 19a

PICTURE 19b
5. Once the slide stop is fixed at its position put the recoil spring and recoil spring plug and lock it with barrel bushing. (Pictures 18 and 19)
6. Now the pistol is fully assembled and ready to use.

SAFETY RULES

  • Safety should be the first concern of every firearm owner in every situation.
  • Always treat your firearm as loaded as such that it will fire if the trigger is pulled; so, handle it with care.
  • Do not put your finger inside the trigger guard unless you intend to fire.
  • Do not fire randomly in public places and into the sky because the bullet can travel in unpredictable directions with considerable velocity and can glance off from any surfaces like rocks or surface water causing unwanted injuries and damages to anyone or any property.
  • Never lock a loaded firearm and never load a locked firearm.
  • Before handling any firearm familiarize yourself with its working and never depend on its mechanical features alone.
  • Do not consume intoxicants before or while shooting; make sure not to use the firearm in unstable mental or physical conditions.
  • Always wear eye and ear protectors that are specified for firearm use.
  • Know all the legal consequences of using the firearm.
  • Before using your firearm ensure that there are no obstructions in the barrel like mud, water, snow or any other object causing dangerous increase in pressure resulting in damage of your firearm and causing unwanted injuries to yourself and others.
  • Always use the specified ammunition for your firearm.
  • Do not disassemble, manipulate, adjust or change any of the internal components of your firearm resulting in improper functioning thus affecting the safety and reliability of your firearm.

STORAGE

  • One of the most important rules of firearm safety is its safe and secure storage.
  • Keep your firearm locked, unloaded and secure when not in use.
  • Keep ammunition and the firearm in separate location.
  • Always prevent your firearm from being stolen or being used by untrained or unqualified individuals.
  • Do not assume a hiding place is a safe storage location and make sure to change the storage place of your firearm from time to time in order to maintain its inaccessibility from unauthorized persons.
  • Always keep your firearm away from children.

TRANSPORTATION

  • Safe and secure transportation of your firearm is solely your responsibility.
  • Make sure your firearm is always unloaded and locked during transportation.
  • Obey all the laws relating to the storage and transportation of firearms. Your local police department can furnish you with available information on storing and transporting a firearm thus preventing unauthorized access of your firearm by others.

MAIN COMPONENTS

1.SLIDE (Including Front and Rear Sight)2.BARREL WITH LINK
3.RECOIL SPRING4.RECOIL SPRING GUIDE
5.RECOIL SPRING PLUG6.SLIDE STOPPER
7.FRAME (Including Grips and Trigger System)8.MAGAZINE

FUNCTIONAL PRINCIPLES

  • After firing the pressure developed by the combustion gas in the chamber recoils the slide and barrel assembly together. After a run of slide barrel assembly, the block falls and releases the slide letting it recoil while the barrel stops against the frame. Period of its rear-ward movement, the slide extract and ejects the fired cartridge case, cocks the hammer and compress the recoil spring, with the force of recoil spring tense, the slide then moves forward feeding the next cartridge from the magazine into the chamber and causing barrel- slide locking. The slide stays open after the last cartridge in the magazine has been fired and eject.
  • CAPRICORN 1911 Pistol models have Grip Safety System. Shooting can be made if the user holds the grip and feels the grip safety by his or her hand.
  • CONTROL BEFORE USAGE Be sure that the chamber is empty and the barrel is free from dirt and obstructions (Picture1). If you do not intend to fire, keep your fingers off the trigger. This pistol has grip safety system that’s why shooting cannot be made if the grip safety is not deactivated by holding the grip by the user, this system provides an extra safety to the pistol (Picture2).

PICTURE 1

PICTURE 2

  • CONTROL AFTER USAGE Make sure that the pistol is unloaded and the barrel is free of dirt. Also make sure that the magazine is empty (Picture 1, 3).

PICTURE 3

PICTURE 4

  • SLIDE AND FRAME CONTROL Release the magazine (Picture 4). Pull the slide all the way back (Picture 3). While drawing the slide back, check whether the slide moves easily on the body frame and cocks the hammer or not (Picture 5). Also check the grip safety is working or not when the hammer is cocked. If the hammer is cocked when you retract the slide, pull the trigger and check if the hammer decocks easily or not (Picture 6). Inserting an empty magazine and repeat the same action. The slide must stay locked and open position in rear (Picture 7)

PICTURE 5

PICTURE 6

PICTURE 7

PICTURE 8

  • TRIGGER AND SAFETY LOCK CONTROL After cocking the hammer, pull the trigger and check if the hammer strikes the firing pin appropriately or not. Make sure that the trigger does not operates when the pistol is at safety position (safety liver is up) (Picture 8). Also make sure that the grip safety is operating perfectly when the safety lock is down.
NOTE: THE SAFETY LOCK CAN BE AT SAFETY POSITION ONLY WHEN THE HAMMER IS COCKED THAT’S WHY THE SAFETY LOCK CANNOT BE USED IF THE HAMMER IS NOT COCKED.
Warning: Never assume that the firearm is unloaded and tamper with it. Never let the muzzle of a firearm point at any part of your body or at another person. This is specifically important when loading or unloading the firearm. Do not apply force to the pistol with any object while handling, cocking, disassembling or cleaning the pistol. The pistol must be controlled by an authorized gun expert in case of an extraordinary condition such as defect, breakdown or heavy drops.
  • PREPARING TO FIRE Make sure that the pistol is on a safety mode (Picture 8). Remove oil from the barrel by using cleaning rod and soft cloth. Check the pistol if it is operating excellent. Be sure that the magazine is housed correctly.
  • LOADING THE PISTOL Insert the loaded magazine to the pistol until the magazine release button is locked. Pull the slide fully back and release it carefully. Now, the pistol is loaded and cocked.
  • FIRING Make sure that the pistol is set at a safety position (Picture 8). This model pistols have single action shooting mechanism. Aim the pistol to the target, rotate the safety lock down (Picture 9). When you are ready to  fire while holding the grip for blocking the grip safety, pull the trigger and fire.

WARNING

The pistol is still loaded, the hammer cocked and ready to be fired again, if you do not intend to fire, keep your fingers off the trigger.

PICTURE 9

  • After last shooting, the slide will stop at the rear side of the pistol. It means that the magazine is empty.
    For shooting again remove the empty magazine and insert the fully loaded magazine. Push the slide stop latch to reload the pistol.
  • UNLOADING THE PISTOL Press the magazine release button to remove the magazine from the pistol (Picture 4). Pull the slide fully back to extract the cartridge from the chamber (Picture 1). When you are sure that the chamber is completely empty & the last cartridge is extracted, release the slide to move forward carefully.

DISASSEMBLY

PICTURE 10

PICTURE 10

1. Remove the magazine by pressing the magazine release button (Picture 4).

2. Hold the pistol with the right hand and pull the slide back until the small notch (second notch from the top of the slide) is at the same level where the Slide stops & hold the pistol at this position (Picture 10).

3. Remove the Slide Stop by pressing the top of the Side Stop with index finger. Separate the Slide stop from the pistol (Picture 11).
PICTURE 13
PICTURE 13
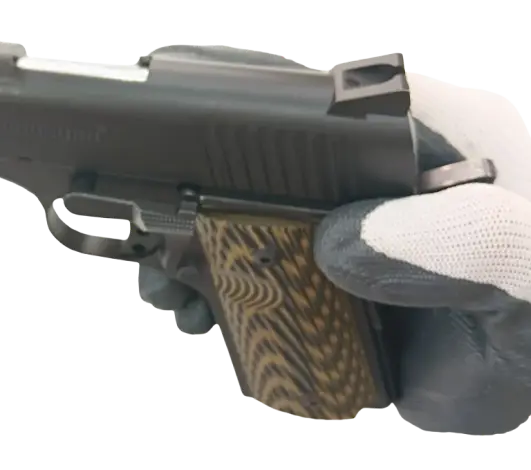
PICTURE 11
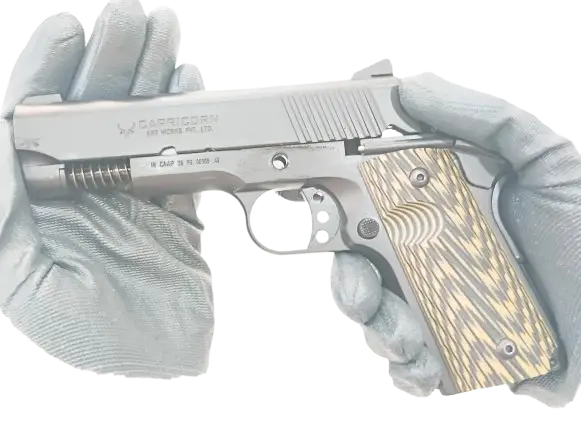
PICTURE 12

4. Hold the slide with the left hand & separate the slide from the frame (Picture 12).

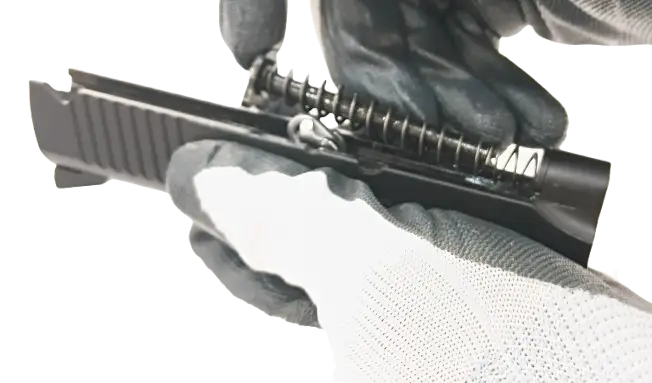
5. Now hold and press the recoil spring guide in forward direction and tilt it in upward direction so that the tension in the recoil spring is released and shown in (Picture 13) now remove the recoil spring guide with recoil spring.

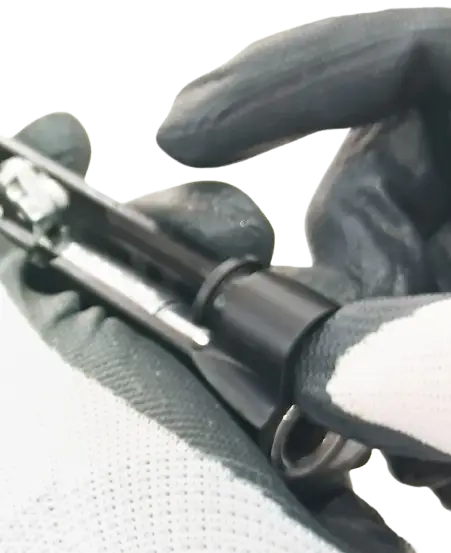
6. Now push the recoil spring plug in backward direction till it get release from the slide as shown in (Picture 13).

7. Now remove the barrel from the slide by pushing it in the forward direction as shown in (Picture 14).
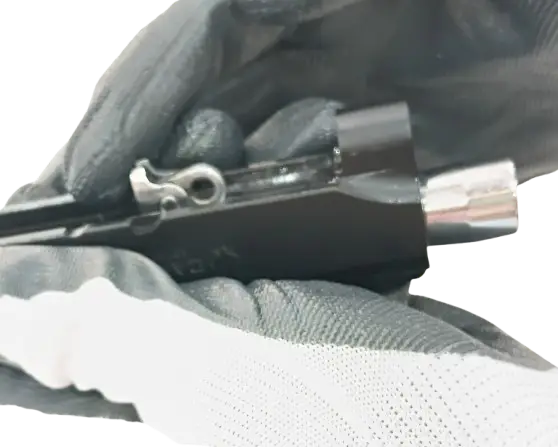
PICTURE 14

8. After these serial operations the main components of the pistol are disassembled & disassembly process is completed.

CLEANING AND LUBRICATION

  • Before cleaning check that the pistol is unloaded (magazine removed from pistol and chamber clear). Also ensure that the magazine is unloaded.
  • Your firearm is a precision instrument. After each use of the pistol or after being subjected to extreme weather conditions, the pistol should be cleaned and lubricated.
  • Also, before using the pistol for the first time, it should be examined and cleaned.
  • Starting with the barrel and from chamber end, insert a brass brush/cloth through the bore of the barrel until the bristles completely exit at muzzle end.
  • Pull the brush back until the bristles completely exit at chamber end.
  • Remove any residue on the frame with light brushing.
  • After cleaning, lightly coat the metal parts, internal and external with high-quality firearm oil.

ASSEMBLY

1. Hold the slide from the right hand and insert the barrel within the slide (Picture 15 & 16).
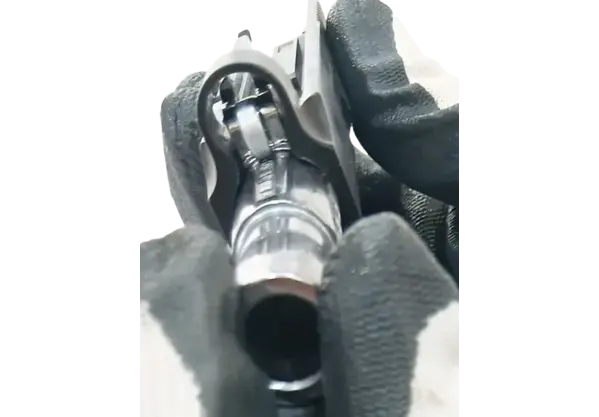
Picture 15
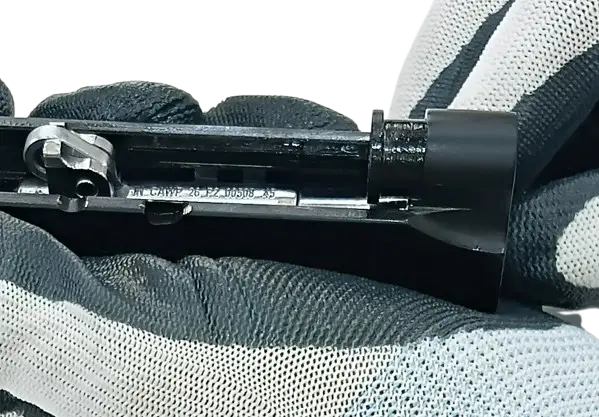
Picture 16

2. Now place the barrel bushing plug in a slide and press it forward until both the face matches completely (Picture 17).
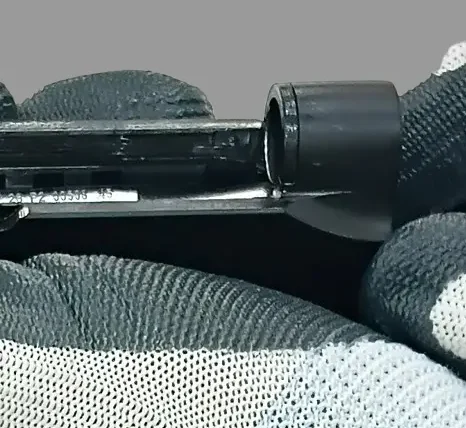
Picture 17

3. Now insert the barrel recoil spring with barrel recoil guide and press it in forward direction till the recoil guide rests on barrel (Picture 18 & 19).
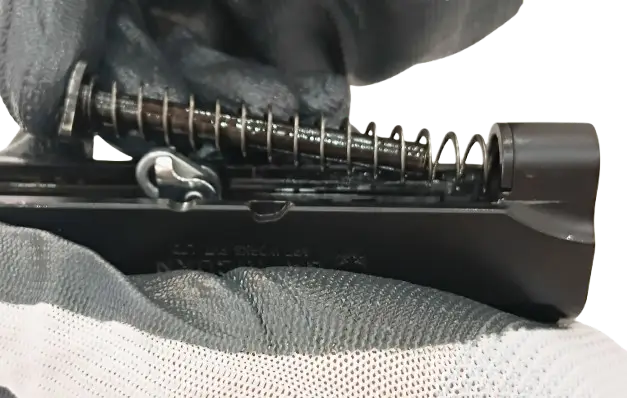
Picture 18
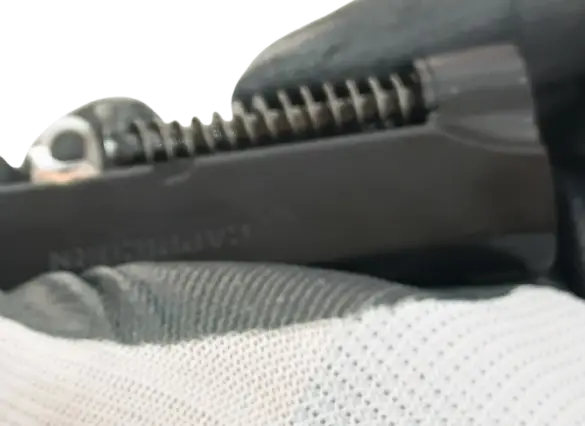
Picture 19

4. Now hold the pistol from the other hand and put the slide to the frame (Picture 20).
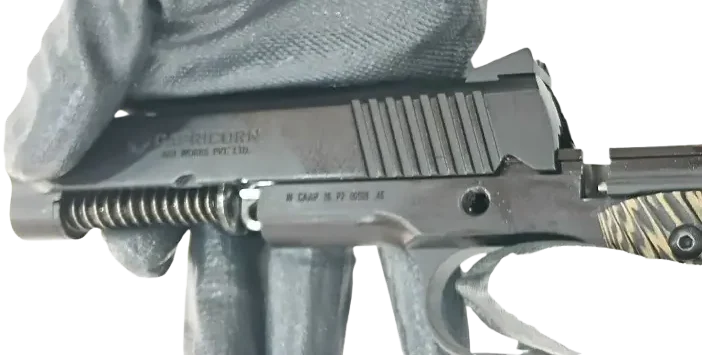
Picture 20

5. Now match the hole position of barrel link and frame.

6. Once the holes get aligned then insert slide stopper and press it in downward direction. (Picture 21 & 22).
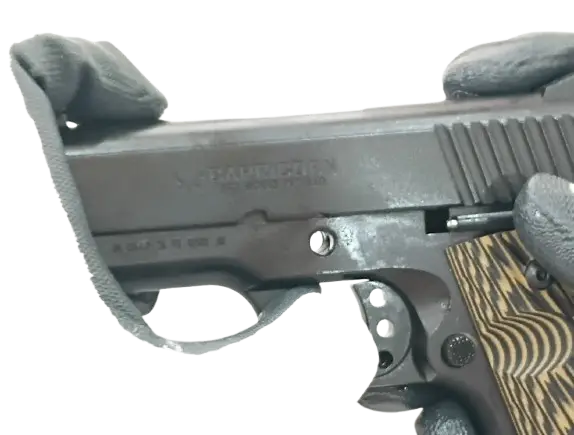
Picture 21
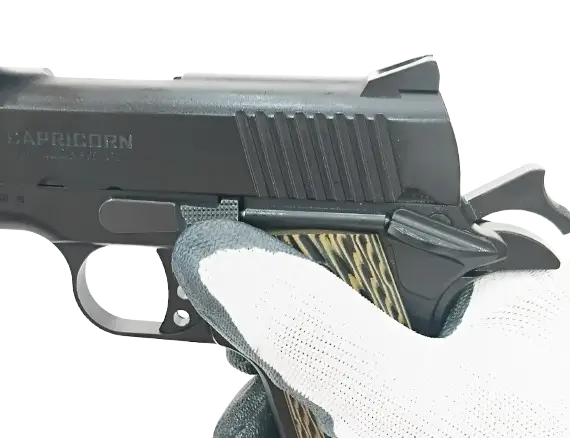
Picture 22

7. Now the pistol is fully assembled and ready to use.
SAFETY RULES

  • Safety should be the first concern of every firearm owner in every situation.
  • Always treat your firearm as loaded as such that it will fire if the trigger is pulled; so, handle it with care.
  • Do not put your finger inside the trigger guard unless you intend to fire.
  • Do not fire randomly in public places and into the sky because the bullet can travel in unpredictable directions with considerable velocity and can glance off from any surfaces like rocks or surface water causing unwanted injuries and damages to anyone or any property.
  • Never lock a loaded firearm and never load a locked firearm.
  • Before handling any firearm familiarize yourself with its working and never depend on its mechanical features alone.
  • Do not consume intoxicants before or while shooting; make sure not to use the firearm in unstable mental or physical conditions.
  • Always wear eye and ear protectors that are specified for firearm use.
  • Know all the legal consequences of using the firearm.
  • Before using your firearm ensure that there are no obstructions in the barrel like mud, water, snow or any other object causing dangerous increase in pressure resulting in damage of your firearm and causing unwanted injuries to yourself and others.
  • Always use the specified ammunition for your firearm.
  • Do not disassemble, manipulate, adjust or change any of the internal components of your firearm resul0ng in improper functioning thus affecing the safety and reliability of your firearm.

STORAGE

  • One of the most important rules of firearm safety is its safe and secure storage.
  • Keep your firearm locked, unloaded and secure when not in use.
  • Keep ammunition and the firearm in separate location.
  • Always prevent your firearm from being stolen or being used by untrained or unqualified individuals.
  • Do not assume a hiding place is a safe storage location and make sure to change the storage place of your firearm from time to time in order to maintain its inaccessibility from unauthorized persons.
  • Always keep your firearm away from children.

TRANSPORTATION

  • Safe and secure transportation of your firearm is solely your responsibility.
  • Make sure your firearm is always unloaded and locked during transportation.
  • Obey all the laws relating to the storage and transportation of firearms. Your local police department can furnish you with available information on storing and transporting a firearm thus preventing unauthorized access of your firearm by others.

MAIN COMPONENTS

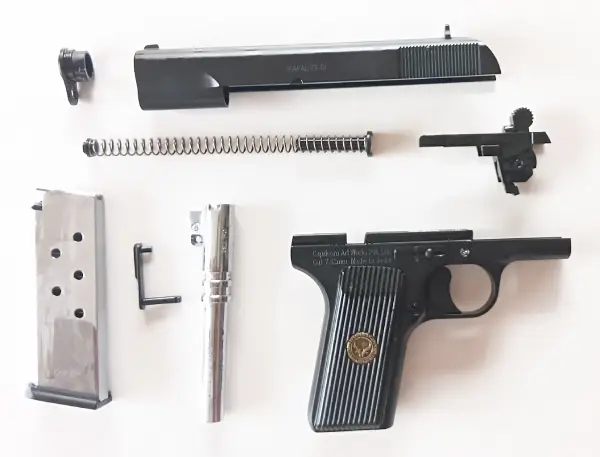
1. Slide (with Front and Rear Sight) 2. Hammer Housing Assembly
3. Barrel with link 4. Barrel Bushing
5. Frame (including Grips & Trigger System) 6. Slide stopper
7. Recoil Spring with Lock 8. Magazine

PISTOL INSPECTION

1. Before inspecting your firearm ensure that it is unloaded. To do this hold the grip of the frame with your finger off the trigger and outside the trigger guard, point the barrel in safe direction and then remove the magazine by pressing the magazine release bukon. (Fig.1)
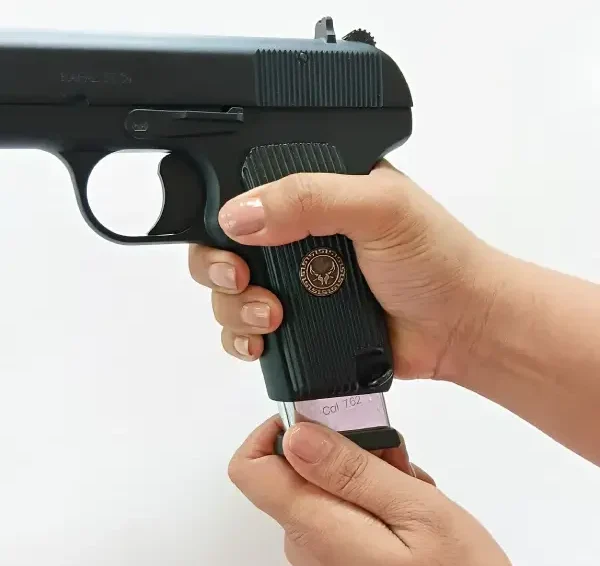
Fig.1

2. Hold the slide from its serrated sides from the rear end with thumb and fingers and pull the slide in fully backward position to extract any cartridge from the chamber and clear it from the pistol. (Fig.2)
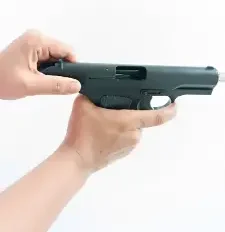
Fig.2

3. To lock the slide in open position, insert an empty magazine into the pistol and then pull the slide fully back and then release to lock it open then remove the magazine and visually check that there is no obstruction in the chamber and the bore is clean and dry.

4. Also check that the firing pin is not protruding out from the breech face if it happens so then do not try to load the firearm instead get it examined from a certified gunsmith. (Fig.3 & Fig.4)
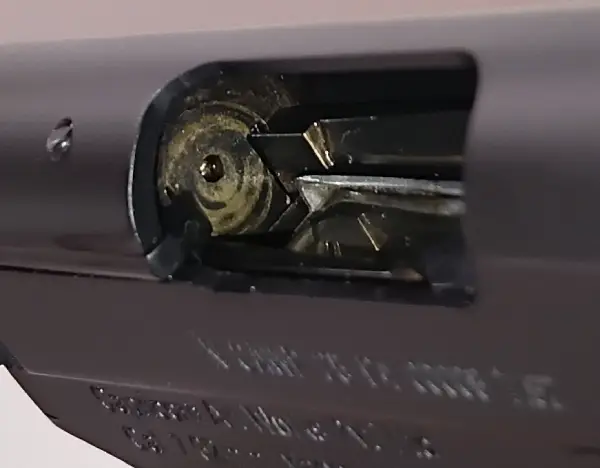
Fig.3

FUNCTIONAL PRINCIPLES

1.Cocking the hammer

• The hammer is cocked by pulling the slide backward.
• When the slide is released and moves forward, a cartridge is taken from the magazine and placed into the barrel.
• The pistol is then loaded and ready to fire.

2.Firing the cartridge

  • The trigger is pulled backward, which releases the hammer.
  • Due to the force of the spring, the hammer moves forward and strikes the firing pin.
  • The firing pin strikes the primer of the cartridge, causing the cartridge to fire.

3.ExtracKon and ejecKon

  • After the cartridge is fired, the pressure of the expanding gases causes the bullet to leave the barrel.
  • The slide moves backward, extrac0ng and ejecting the empty cartridge case.
  • At the same time, the hammer is cocked again.

4.Loading the next cartridge

  • The recoil spring causes the slide to move forward.
  • As the slide moves forward, it brings another cartridge into the barrel.

5. After the last cartridge is fired

  • When the last cartridge is fired, the slide stopper (A) is lifted.
  • It’s lug enters the notch on the slide.
  • This holds the slide in the rear posiKon (Fig. 5).

Fig.5

6.Replacing the magazine

  • To continue shooting, the empty magazine must be replaced with a loaded one.
  • Press the magazine release button (B) to remove the empty magazine.
  • When a loaded magazine is inserted, Push the slide stopper (A) in downward direction.
  • The slide is then released and moves forward, loading a cartridge into the barrel.
  • The pistol is then ready to fire again.

7. If the magazine is not replaced

  • If there is no need to replace the magazine after the last cartridge has been fired, the slide stopper (A) is pressed downward.
  • This releases the spring, which returns the slide to the front position.

8.Blocking the Pistol

There are two ways to block the pistol with the hammer:

(1)When the hammer is cocked

  • When the hammer is cocked, hold the hammer and pull the
    trigger until the hammer is released.
  • Release the trigger and slowly lower the hammer until the sear
    catches the first cam on the hammer.
  • This blocks both the hammer and the slide.
  • This action should be performed very carefully, with the pistol pointed upwards. (Fig.6)

(2)When the hammer is lowered

When the hammer is already lowered, pull it backward a short distance until the trigger catches the first cam on the hammer.

This blocks the pistol.

If you want to fire, pull the hammer fully backward. (Fig.7)
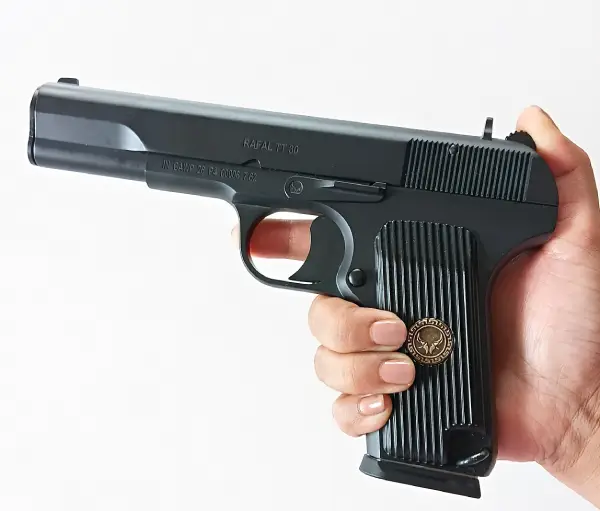
Fig.6
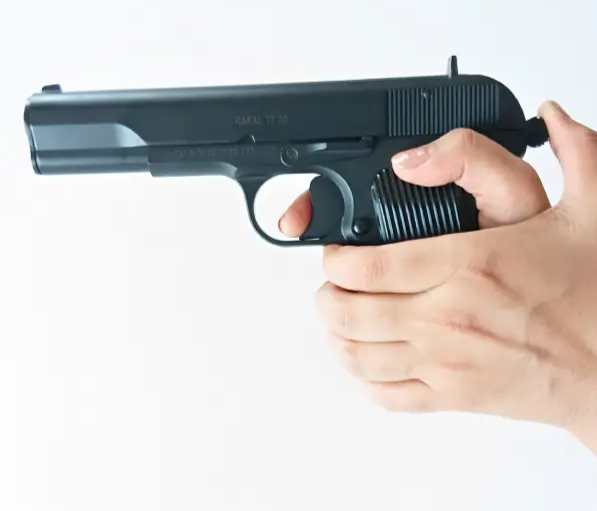
Fig.6

WARNING

The pistol is still loaded, the hammer cocked and ready to be fired again, if you do not intend to fire, keep your fingers off the trigger.
  • After last shooting, the slide will stop at the rear side of the pistol. It means that the magazine is empty. For shooting again remove the empty magazine and insert the fully loaded magazine. Push the slide stop latch to reload the pistol.
  • UNLOADING THE PISTOL: Press the magazine release button to remove the magazine from the pistol (Picture 4). Pull the slide fully back to extract the cartridge from the chamber (Picture1). When you are sure that the chamber is completely empty & the last cartridge is extracted, release the slide to move forward carefully.

DISASSEMBLY

1. Removing the magazine (Fig.8)

  • Release the magazine by pressing the magazine release buttion and then remove the magazine from the pistol.
  • Unload the magazine by holding it with the bullet end of the cartridge pointing away from you and pressing each cartridge forward and out of the magazine.
  • Before proceeding with further disassembly, pull the slide backward and check whether there is a cartridge in the barrel.

Fig.8

2. Releasing the Slide Stop Retainer Clip (Fig. 9)
  • The slide stopper is secured by a Slide Stop Retainer Clip.
  • To release the slide stopper, push the Slide Stop Retainer Clip backward using a wooden object.

Fig.9

3. Removing the Slide Stopper (Fig. 10)
  • Push the released slide stopper toward the left side of the pistol

Fig.10

4. Saperating the Slide and Hammer Housing Assembly from the Frame (Figs. 11 and 12)
  • Push the slide forward to separate it from the frame.
  • The barrel, recoil mechanism, and guide bushing are removed together with the slide.
  • Once the slide is separated from the frame, pull the Hammer Housing Assembly upward and separate it from the frame.

Fig.11

Fig.12

5. Removing the Recoil Mechanism (Recoil Spring with Guide) (Fig.13)
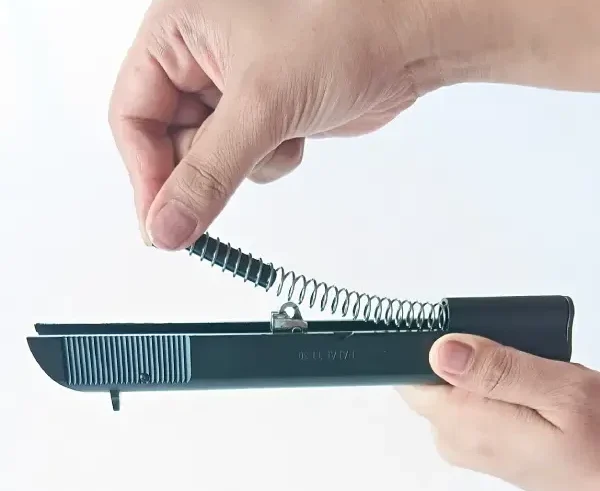
  • Push the guide toward the muzzle.
  • Lift the recoil spring and guide.
  • Remove the recoil mechanism from the slide.

Fig.13

6. Removing the Guide Bushing (Fig.14)
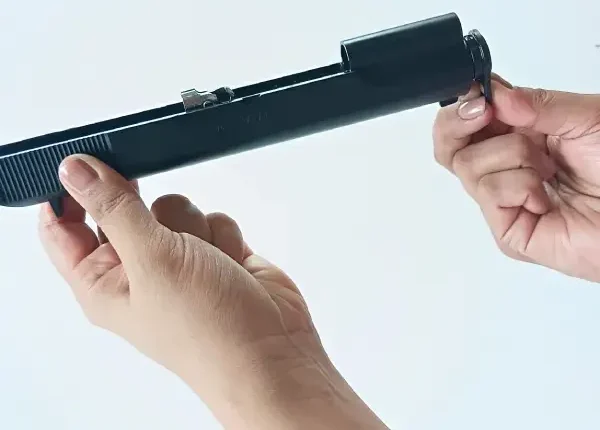
  • Turn the guide bushing 180°.
  • Remove the guide bushing from the slide.

Fig.14

7. Saperating the Barrel (Fig.15)
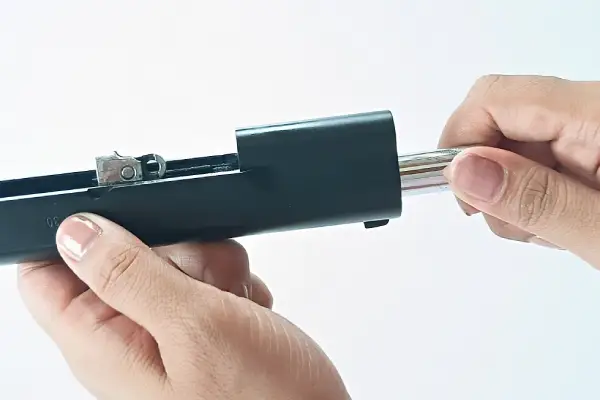
  • Push the barrel so that its ribs come out of the grooves in the slide.
  • Rotate the connec0ng plate until it rests against the barrel.
  • Pull the connec0ng plate forward to remove it from the barrel.

Fig.15

8. Further Disassembly

  • The pistol is stripped for cleaning and lubrication.
  • The owner should not disassemble the pistol any further.
  • Any further maintenance or disassembly should be performed by a qualified gunsmith or authorized service professional.

CLEANING AND LUBRICATION

  • Before cleaning check that the pistol is unloaded (magazine removed from pistol and chamber clear). Also ensure that the magazine is unloaded.
  • Your firearm is a precision instrument. After each use of the pistol or after being subjected to extreme weather conditions, the pistol should be cleaned and lubricated.
  • Also, before using the pistol for the first time, it should be examined and cleaned.
  • Starting with the barrel and from chamber end, insert a brass brush/cloth through the bore of the barrel until the bristles completely exit at muzzle end.
  • Pull the brush back until the bristles completely exit at chamber end.
  • Remove any residue on the frame with light brushing.
  • After cleaning, lightly coat the metal parts, internal and external with high-quality firearm oil.

ASSEMBLY

1. The firearm is assembled by following the reverse sequence of the disassembly process.
2. During assembly, the relevant components must be correctly aligned and positioned.
3. The guide, barrel, connecting plate, and slide stopper components must be properly seated.
4. The guide should be correctly positioned relative to the barrel and guide bushing.
5. The slide stopper components should align correctly with the corresponding openings in the frame.
6. Safety check: After assembly, the firearm should be inspected to ensure that it is properly assembled and functioning safely.

Fig.16

Fig.17

SAFETY MEASUREMENTS

  • Safety should be the first concern of every firearm owner in every situation.
  • Always treat your firearm as loaded and assume that it will fire if the trigger is pulled; so handle it with care.
  • Do not put your finger inside the trigger guard unless you intend to fire.
  • Do not fire randomly in public places and into the blue because bullet can travel in unpredictable directions with considerable velocity and can glance off from any surfaces like rocks or water user causing unwanted injuries and damages to anyone or any property.
  • Never load a loaded firearm and never load a locked firearm.
  • Before handling any firearm familiarise yourself with its working and never depend on its mechanical safety.
  • Do not consume intoxicants before or while shooting; make sure not to store the firearm in unstable environmental conditions.
  • Always wear eye and ear protectors that are specified for firearm use.
  • Know all the legal consequences of using the firearm.
  • Before using your firearm ensure that there are no obstructions in the barrel like mud, water, snow or any 3 other object causing dangerous increase in pressure resulting in damage of your firearm and causing unwanted injuries to yourself and others.
  • Always use the specified ammunition for your firearm.
  • Do not disassemble, manipulate, adjust or change any of the internal components of your firearm resulting in improper functioning thus affecting the safety and reliability of your firearm

STORAGE

  • One of the most important rule of firearm safety is its safe and secure storage.
  • Keep your firearm locked, unloaded and secure when not in use.
  • Keep ammunition and the firearm in separate location.
  • Always prevent your firearm from being stolen or being used by untrained or unqualified individuals.
  • Do not assume a hiding place is a safe storage location and make sure to change the storage place of your firearm from time to time in order to maintain its inaccessibility from unauthorized persons.
  • Always keep your firearm away from children.

TRANSPORTATION

  • Safe and secure transportation of your firearm is solely your responsibility.
  • Make sure your firearm is always unloaded and locked during transportation.
  • Obey all the laws relating to the storage and transportation of firearms. Your local police department can furnish you with available information on storing and transporting a firearm thus preventing unauthorized access of your firearm by others

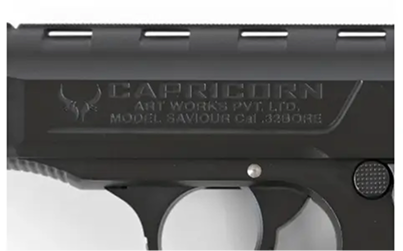
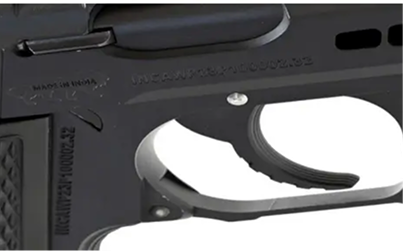
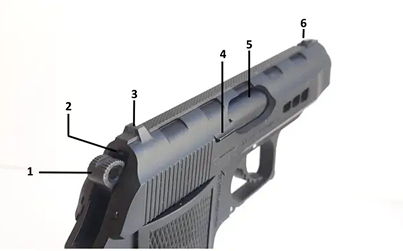
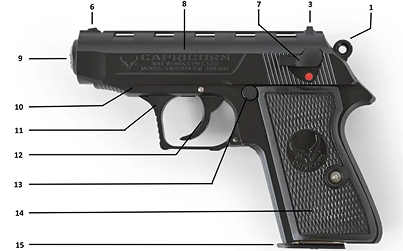
FEATURE IDENTIFICATION

Fig.4.1

Fig.4.1

Fig.4.1

Fig.4.3

Fig.4.3

Fig.4.4

Fig.4.4

PISTOL INSPECTION

fig-5.1

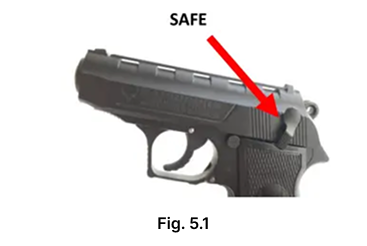
1. Before inspecting your firearm ensure that it is unloaded. To do this hold the grip of the frame with your finger off the trigger and outside the trigger guard, point the barrel in safe direction. Rotate safety lock fully down into (SAFE) position as shown in Fig 5.1 then remove the magazine by pressing the magazine release button
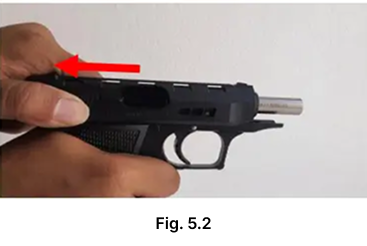
fig-5.2

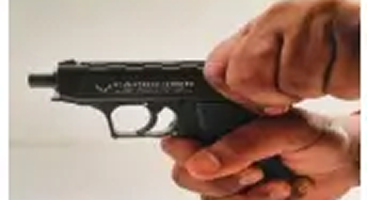
2. Hold the slide from its serrated sides with the rear end with thumb and fingers and pull the slide in fully backward position and extract any cartridge from chamber and clear it from the pistol.
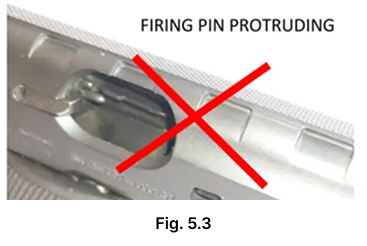
fig-5.3

3. Hold the slide from its serrated sides with the rear end with thumb and fingers and pull the slide in fully backward position and extract any cartridge from chamber and clear it from the pistol.
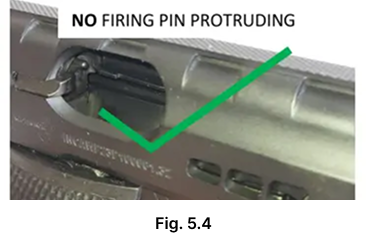
fig-5.4

4. Also check that the firing pin is not protruding out from the breech face if it happens so then do not try to load the firearm instead get it examined from a certified gunsmith.
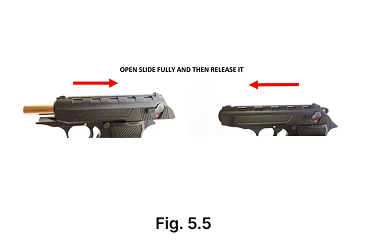
fig-5.5

5. To close the slide on unloaded pistol, first remove the magazine and then pull the slide fully back and release it. Make sure that the slide moves freely along the frame through its full length of travel.
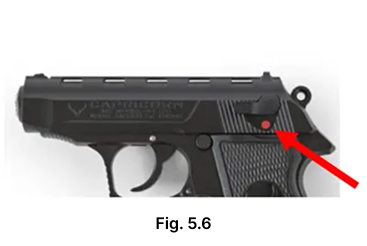
fig-5.6

6. Familiarize yourself with the safety lock on your pistol. When the safety lock is fully up (parallel to the top of the slide) it is in (FIRE) position see Fig (5.6); when the safety lock is fully down it is in the (SAFE) position see Fig (5.7). Notice how the safety lock looks and feels in each of the two positions of its extreme travel – fully up for (FIRE) and fully down for (SAFE).
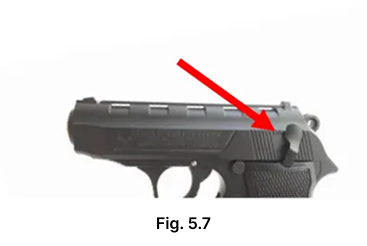
fig-5.7

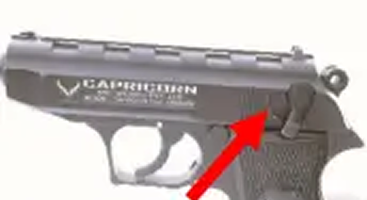
7. Your pistol will have a red dot, which is totally visible when the safety lock is in the (FIRE) position; however, do not depend on your inability to see a red dot as the only indication that the safety lock is engaged.
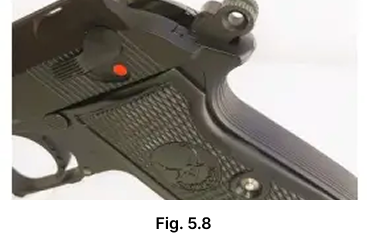
fig-5.8

8. To unload a loaded magazine, hold it with the bullet end of the cartridge pointing away from you and others and press each cartridge forward and out of the magazine.
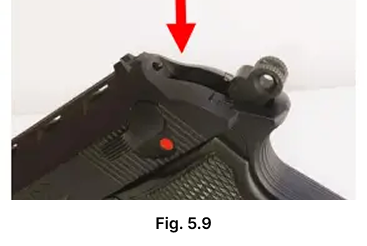
fig-5.9

9. To check whether there is bullet in the chamber of your pistol there is a loaded chamber indicator pin which can be observed by looking at the rear of the slide just above the hammer, see Fig. (5.8) noting a small hole. If the firearm’s chamber is loaded, you will observe a pin protruding from this hole, see Fig (5.9).

10. You must follow this procedure every time a firearm leaves your hand, is cleaned, handed to you or another person, transported or stored.
OPERATING INSTRUCTIONS

op-intruction1

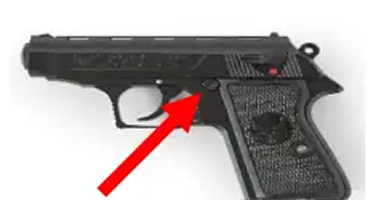
1. To remove the magazine press the magazine release button, located near the trigger guard, with your thumb.
op-intruction2

2. Hold the magazine with one of your hands and with the other one insert the cartridges one at a time, pressing them down and to the rear. Insert the magazine into the pistol until it is held by the magazine lock. If the magazine lock is not engaged, the magazine can fall out during firing.
op-intruction3

3. Hold the pistol with one hand keeping your finger away from the trigger. With the other hand pull the slide to its limit and release it, so slide will go forward under recoil spring pressure and insert one cartridge in the chamber.
op-intruction4

4. The pistol is now ready to fire by pulling the trigger. After firing, the slide will recoil from gas pressure, ejecting the empty case and feed another cartridge into the chamber from the magazine. The pistol is now ready to fire again.
op-intruction

5. After firing, you must allow the trigger to move fully forward before you can fire the next shot. Failure to do so will prevent the lockwork from fully cycling and will prevent you from being able to fire the next shot. Keep your finger off the trigger and outside the trigger guard until you are ready to fire again. This sequence can be repeated until the last round has been fired. Trigger pull and trigger travel is the same from the first to the last round.
op-intruction5

6. After the last round has been fired at which time the magazine follower exerts upward pressure on the slide stop causing it to engage the slide and hold it in the “open” position. In order to make it return to its rest position, pull the slide fully back to its rear end and release it, let the slide go forward (you must remove the empty magazine first).
op-intruction6

7. If you choose to stop firing and magazine is not empty, place firearm on safe by moving safety lock to the down position, remove magazine. While pointing in a safe direction pull the slide back towards its rear end, the magazine follower exerts upward pressure on the slide stop causing it to engage the slide and hold it in the “open” position at this position you can check and make sure that if the chamber is empty.

SINGLE ACTION FIRING REQUIRES SIGNIFICANTLY LESS PRESSURE ON THE TRIGGER AND REDUCED TRIGGER TRAVEL THAN DOUBLE ACTION FIRING.
DISASSEMBLEY OF FIREARM

fig-7.1

1. Point the pistol in a safe direction and rotate the safety decocking lever into the down (SAFE) position.

2. Remove the magazine by depressing the magazine release button and clearing it from the firearm.

3. Clear the chamber and verify that it is empty.

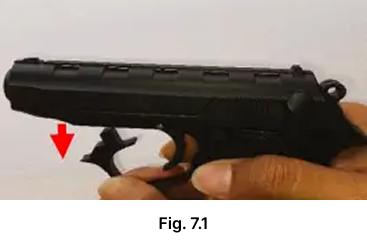
4. With the pistol unloaded, hold the grip firmly in one hand and put your index finger along the side of the trigger guard. With your other hand, pull down the front of the trigger guard (Fig. 7.1).
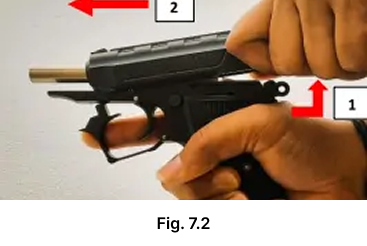
fig7.2

5. When the front of the trigger guard comes out of the frame, press it sideways with your index finger to keep it from springing back up into the frame.

6.With your free hand, grab the slide by its grooves and pull it all the way back until you can lift the back end up, clear off the frame (Fig. 7.2). Ease the slide forward and off the pistol.
7. Be careful not to let go of the slide while you can still feel the spring tension, or it could fly off the pistol and be damaged or cause injury.

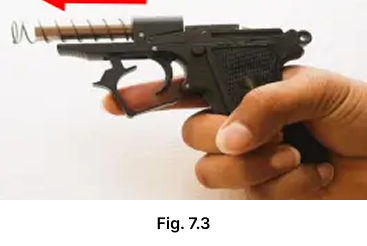
8. Pull the recoil spring off the front of the barrel (Fig.7.3). No Further disassembly is required.
REASSEMBLEY OF FIREARM

fig-8.1

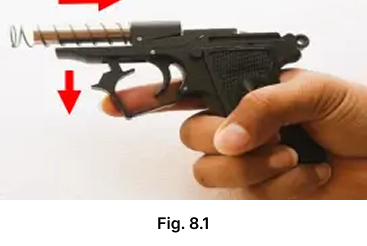
1. Put the recoil spring, small end first, on the barrel as shown in Fig. 8.1. (If you put it on the large end first, it can fall off when you point it down). Cock the hammer. Pull the trigger guard down out of the frame as shown in Fig. 8.1.
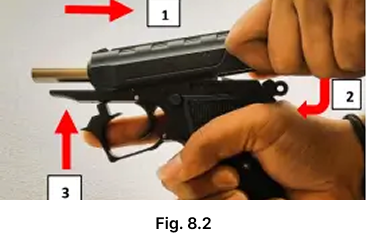
fig.-8.2

2. Put the slide over the forward end of the recoil spring and pull the slide back onto the barrel all the way until it stops (Fig. 8.2).
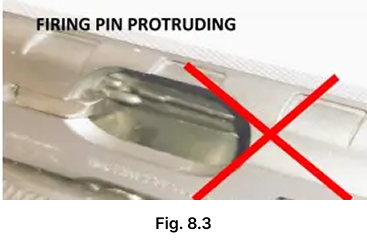
fig.-8.3

3. Then push the rear of the slide down until the grooves inside the slide line up with the rails on the frame. When properly aligned, ease the slide forward all the way.

4. Then let go of the trigger guard so it goes up into the frame.
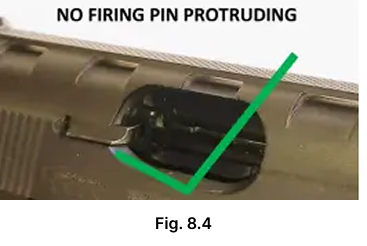
fig.-8.4

5. Before you load the pistol, check for proper assembly.

6. Look at the breech face (Fig 8.3 & Fig 8.4) and in the chamber and barrel, slide the slide back and forth, put an empty magazine in, and be sure the slide locks open. Be sure the pistol is unloaded and pointing in a safe direction when you test its functions.

CARE AND MAINTENANCE

The firearm may be cleaned and lubricated under normal conditions with the disassembly steps described under point no 7 & 8.

In order to keep a firearm safe to use, it must be kept clean and covered with a light film of good quality oil to prevent corrosion. The barrel bore should be cleaned and left free of debris. For normal cleaning, rub the pistol with a lightly oiled cloth. In the same way, proceed with the bore of the barrel. Excess oil should be removed. Dust should be removed from all crevices with a small clean brush.

WARNING

Before cleaning, (1) point the muzzle in a safe direction, (2) keep your finger off the trigger, (3) remove the magazine, then (4) pull back the slide and lock it to the rear, (5) look and feel the magazine well and chamber to confirm the pistol is empty. Never attempt to clean a loaded firearm.

Need More Information?

Explore four distinctive platforms, each engineered and finished in-house.